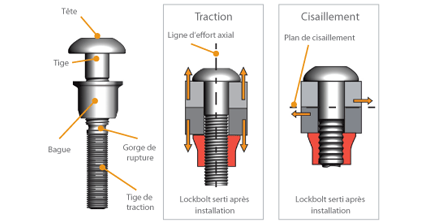
How lockbolts work
Clamp Force or Pre–Load: In the initial stages of the installation process, the tool engages and pulls on the pintail. The joint is pulled together before the conical shaped cavity of the nose assembly is forced down the collar. This progressively locks (swages) it into the grooves of the harder pin. The pin and swaged collar combine to form the installed fastener.
The squeezing action reduces the diameter of the collar, increasing its length. This in turn stretches the pin, generating a clamp force over the joint.
Shear strength of LockBolts vary according to the material strength and minimal diameter of the fastener. By increasing the diameter or the grade of material, the shear strength of the fastener can be increased.
The tensile strength of LockBolts is dependent on the shear resistance of the collar material and the number of grooves it fills.
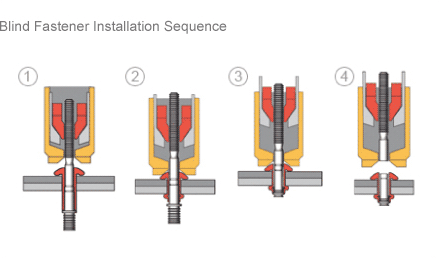
1. Pin placed into prepared hole – Collar placed over pin
2. Tool is placed over the fastener pintail and activated – Pin head pulled against material – Anvil pushes collar against joint – Initial clamp generated
3. Tool swages collar, increasing clamp
4. Pintail breaks, installation complete